• Home
  • Technical Articles

Accidental Jibe Preventer - Rigging a Boom Preventer


Technical Articles

Tag: rigging sails upgrades

According to Wikipedia, “A preventer, or jibe-guard, is a mechanical device on a sailing vessel which limits the boom's ability to swing dangerously across the boat during an accidental jibe. The uncontrolled jibe (or gybe) is feared by all sensible yachtsmen. The heavy boom can potentially inflict severe head injuries or dispatch crew members over board; even the mainsheet or traveler can also inflict serious injury. Uncontrolled jibes may also damage the boat itself.”

On Sea Shadow, a Catalina 320 (#808), we take the threat of the uncontrolled jibe very seriously. While I have always secured the boom to a forward deck cleat when sailing any lower than 120 degrees apparent off the wind, it was not until I had the opportunity to sail with Orlando Duran on his Catalina Morgan 44 that I learned a better way to rig a boom preventer.

The main sheet on the C320’s runs thru two blocks. On the aft most block, I hung a 3-inch shackle from the bail that the block attaches to. Picture number one shows this arrangement.


From each of the forward deck cleats, I hung 3-inch shackles and then a single block off each of them. The reason for the long shackles here is to leave room for mooring lines. Picture number two shows this arrangement. Note that the preventer lines are in the stowed versus deployed position in this picture.


Moving aft, I hung a single block on the base of each stanchion port and starboard sides for a total of 8 blocks, 4 on each side. Picture three shows this arrangement for one of the stanchions. This picture also shows a Garhauer E-Z glide genoa fairlead car, a wonderful addition for keeping one in the cockpit when the cars need to be moved.


At the base of the forward part of each side of the aft wraparound-stanchion, I attached a single block with cam cleat. Picture number 4 is a close-up of this block but it also shows in picture number 3.
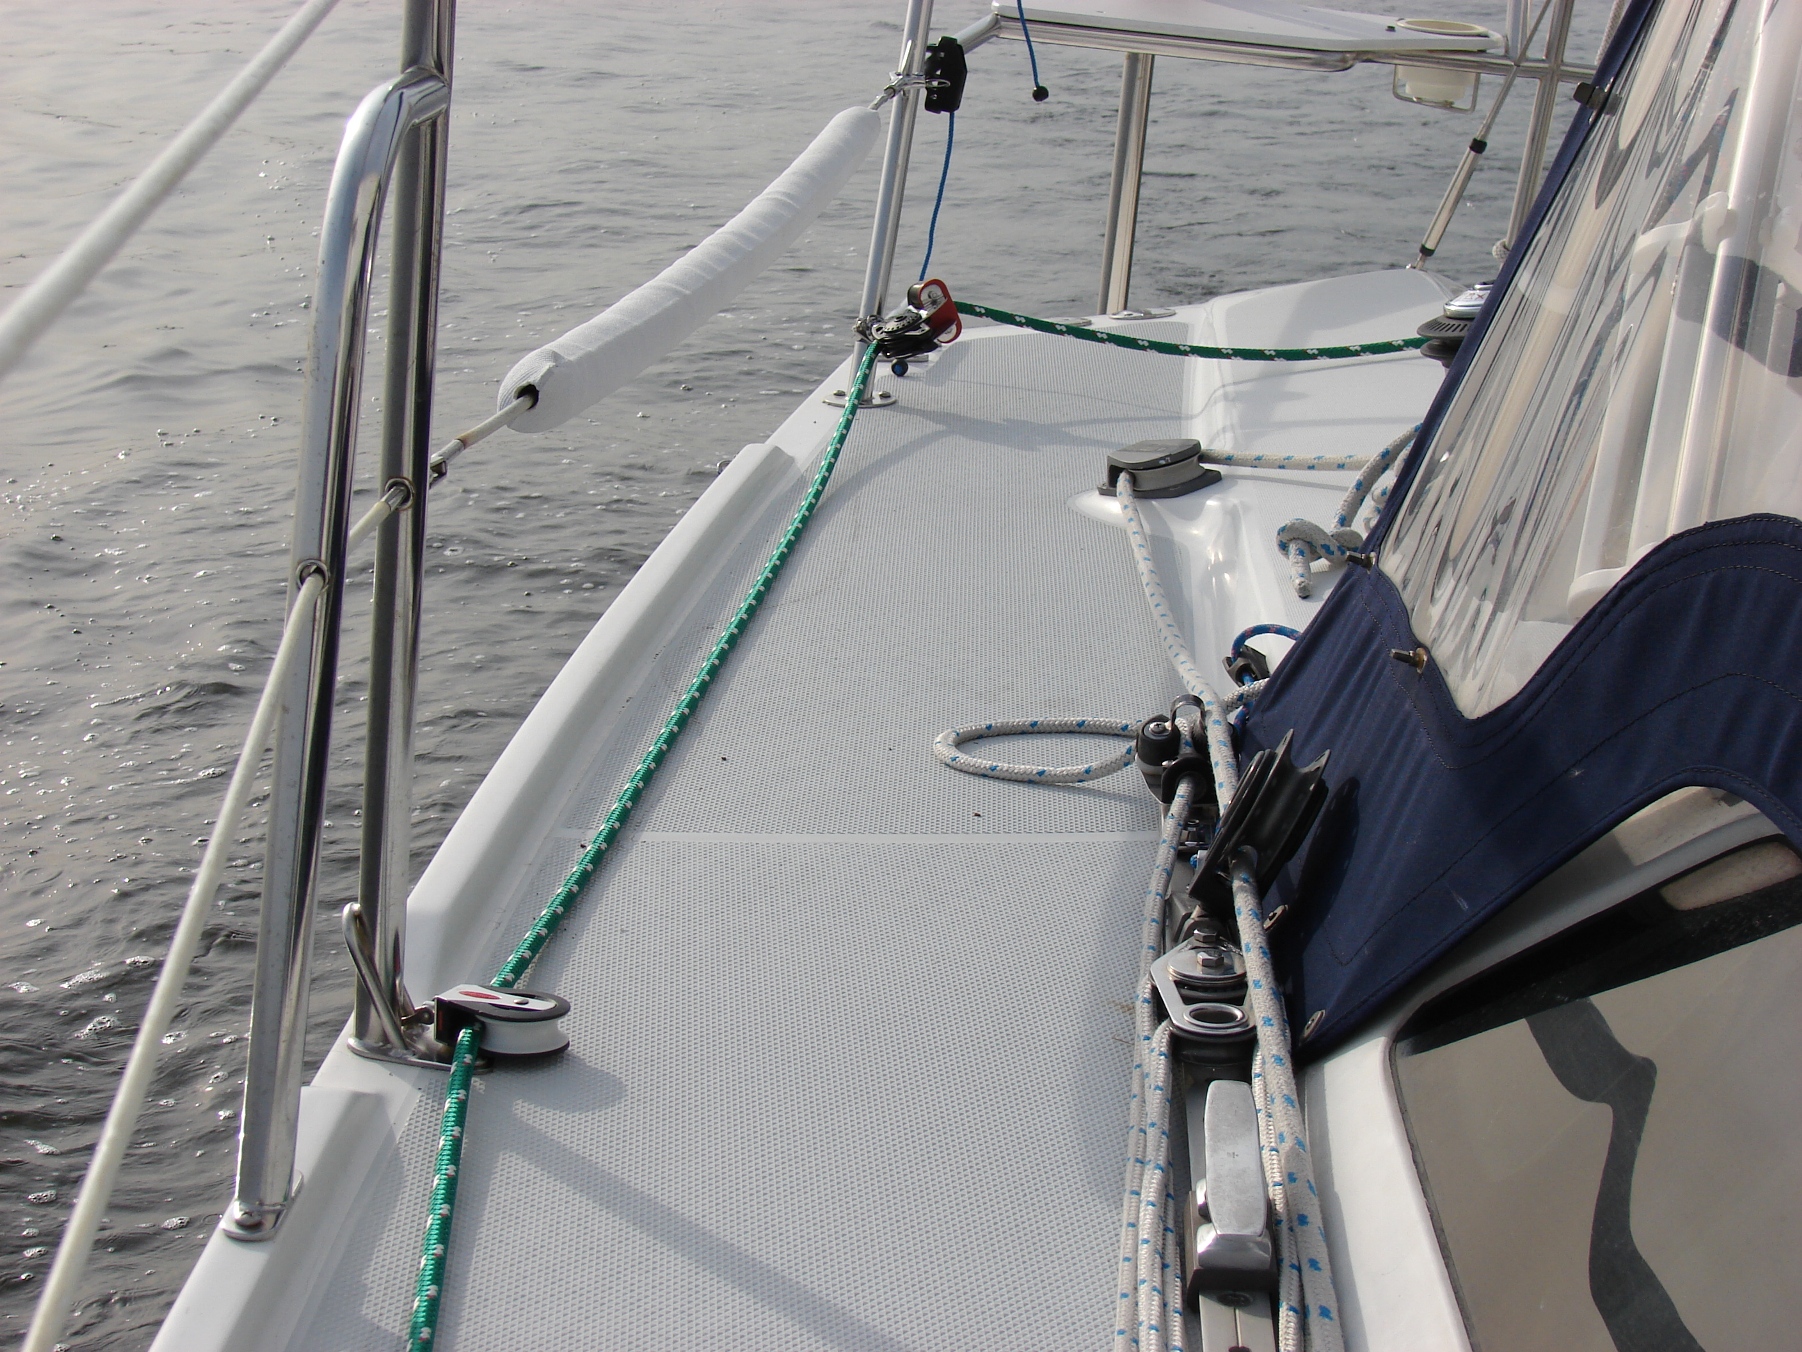

Sea Shadow has two 66-foot preventer lines, one for port and one for starboard (red line for port, green for starboard). West Marine's professional rigger spliced onto the end of each preventer line Quick Release Shackles, both visible in picture number one above. These two shackles are then attached to the shackle on the aft most mast bail, again visible in picture number one above. The preventer lines then run forward to the blocks on the forward cleats (see picture number two) then back through the blocks at the base of the stanchions and through the blocks with cam cleats (pictures three and four). Once these lines are deployed, I can control the boom 100% from the cockpit.

I was hesitant to use the anchor roller for any of this. Worst case scenario on Sea Shadow in a particularly violent accidental jibe probably is that the boom breaks or bends mid-boom or a deck cleat pulls out. Worst case scenario by using any part of the anchor roller is the anchor roller plate gives way, the forestay breaks and the mast comes down. (NOTE: I did hang a block off the anchor bail and run the asymmetrical spinnaker tack line through this block and up to the ATN Tacker. A rigger saw this and cautioned me that this puts loads on the anchor roller and there is a danger of it pulling out. But the maximum apparent wind I will fly the spinnaker is 12 knots; gets any higher, the spinnaker comes down.)


Our spinnaker pole is mounted to the mast on a track so is fairly easy to handle, much easier than when deck and/or stanchion mounted, as one end of the pole is always attached to the boat. Between the preventer rigging and mast-mounted pole, we have no hesitation going DDW (dead downwind) wing-on-wing under virtually any conditions. Note that although we carry and use an A-Sym spinnaker, the A-Sym is not a DDW sail.

Allan S. Field, Sea Shadow, #808
 

0 Comments

Overheating Engine


Technical Articles

Tag: engine

An overheating diesel is usually the result of one of three conditions: either the engine is working harder than normal (possibly due to a clogged or defective injector), the supply of cooling water has been reduced, or the thermostat is failing to open. The actual temperature of the cooling water will also affect your engine’s operating temperature but this is a change that usually occurs gradually as the season progresses.
 

Continue Reading

Improved Boarding Ladder


Technical Articles

 Tag: upgrades

The MkII design features a redesigned boarding ladder which can be deployed from the water. On my pre-MkII boat, ladder deployment, if in the water and not having a mate onboard, was a concern of mine. I attached lines to the latches and to the ladder and they can easily be reached while in the water. The lines release the ladder and pull it down to the water. Safety is a good thing.
- Wayne Strickland, Wayne's World, #594

Reducing Icebox Volume


Technical Articles

Tag: upgrades galley

One of the many modifications we have made to Tradewind, hull number 626, is to reduce the interior volume of the icebox using removable pieces of foam. On previous boats we were accustomed to using an ice chest and rowing ashore every couple of days to get ice, so having refrigeration was a true luxury. But the cavernous volume of the icebox required more engine hours, and beyond milk for cereal, a couple of cold beers, produce, and a few other items needing to stay cold, the rest was wasted space. So I set about making it into an ice-chest sized volume.

dumpsters around the harbor I collected several discarded Boogie Boards for their foam. It can be measured and marked with a Sharpie pen, and accurately cut with several passes from a filet knife. Just cutting a rectangle to sit on the “ledge” about twelve inches down reduces the volume by about a third, and means no more blindly groping for items in the well at the bottom. Then I cut a vertical piece which fits snugly under the gasketed plastic insert in the middle to reduce the volume by another fifty percent, and the result is about the size of an ice-chest. After returning from a cruise I remove all pieces and swab out accumulated moisture from the well at the bottom, as I have plugged the drain, (I keep a dry bilge.) So now our solar panel mounted on the bimini, along with minimal motoring, keeps up with the electrical demands of our refrigeration system.

- Dave White, Tradewind, #626

Repairing the Aqualift Muffler


Technical Articles

Tag: engine upgrades

The Aqualift muffler on Silver Lining recently developed a leak due to a crack in the underside of the base. Unfortunately, this appears to be a problem that has affected a large percentage of our owners, so there was an abundance of information on our discussion list to review. A C36 owner also assisted me as he had been through the same problem, although his cracks were in a different location (the exposed portion of the base as well as inside the mounting holes). I have also heard of cracks to the hose tube. After hearing bad reports about the quality of the Catalina factory repair, and not wanting to be without the use of the boat for 2-3 weeks, I decided to make the repairs myself.


Continue Reading

Head Maintenance


Technical Articles

Tag: head maintenance

There has been a lot of discussion recently about replacing the marine toilet. Several members have taken the advice of others (including testing recently conducted by Practical Sailor magazine) and are replacing the Jabsco Compact unit with the higher rated, and more expensive, Raritan PHII. It appears to be a fairly easy conversion, although new bolt holes for the base must be drilled.

Here are a few tips for getting the most life out of whichever marine toilet you use:

Some marine writers advocate pouring a cup of vegetable oil or mineral oil down the toilet to keep those valves supple, and to lubricate the seals of the manual pump plunger if the unit has one. However, the nation’s foremost expert on marine heads, Peggy Hall, directly contradicts this advice. If you have a manual head, she suggests that you dismantle the pump occasionally, check the plunger stem and its O-rings and coat both with a PTFE lubricant (such as Synco’s Super-Lube Teflon Grease).

At the end of each weekend, or any time the boat will sit, after you've closed the seacock, run a quart of clean fresh water through the toilet, followed by a cupful of undiluted white vinegar. The clean fresh water will go a long way toward preventing odor from permeating the head discharge hose. The vinegar dissolves sea water minerals so they don't build up in the hose. Be sure to push the vinegar all the way through the discharge. Don't leave it sitting in the bowl more than a few minutes. It won't do any good sitting in the bowl, but it will cause the joker valve to swell up and distort if it soaks in vinegar for days.

Cleaning Interior Wood


Technical Articles

Tag: interior maintenance

What is important to remember is that you are actually cleaning and polishing the finish, not the underlying wood. For us, that means the cured Target Coatings Oxford II water based acrylic lacquer or, more recently, the 7000 series HybriVar WB, which offers more clarity and chemical resistance. So put away the oil soap or lemon oil and use plain old window cleaner. High pH cleaners (ex. 409) can dull the finish over time. If you’re trying to remove fine scratches, Target Coatings recommends 3M Finesse. I’ve had some good luck using a paste polishing compound designed for automobile clearcoat finishes. It has given the sole on Silver Lining some additional luster and richness – just don’t overdo it and make it too slippery. Also, never use any wax or silicone-based products.


LED Lighting Addition


Technical Articles

Tag: upgrades interior

We’d arrive at the boat at night, we’d find ourselves stumbling around looking for a flashlight and trying to find the light switches. My solution was to install two red LED fixtures (ABI - 471124). One is located behind the companionway stairs and the other is located over the circuit breaker panel, shining down to illuminate the switches. I used a spare position on the panel and installed a 5A breaker in order to have a way to easily switch the fixtures on and off. The fixture behind the stairs was easily recessed into the bulkhead; the one above the panel needed to be surface mounted, requiring the fabrication of a mounting block. An unexpected benefit has been in using these lights while anchoring out. They make a great “nightlite”, drawing little current (60mA total), yet providing enough light to move about the cabin. Putting one more fixture in the head compartment (the usual late night destination) will make this installation complete.

Trash Can Alternatives


Technical Articles

Tag: upgrades interior

Several of our owners have come to the conclusion that the factory-supplied trash can location (under the galley sink) is woefully inadequate for anything more than daysailing or for storing your cleaning supplies. Three alternatives have been suggested, each of which offers a larger container with improved access. Several owners have an under the nav table arrangement. Orlando Duran (Cuba Libre 2 #112) suggests placing the trash can (13L size) under the nav table, installing a couple of hooks and running some shock cord around the can...out of site, out of mind. Joe Barrett (Island Time #689) suggests using a couple of suction cups instead of the hooks. Pat Moriarty (Sexual Heeling #130) made a beautiful, slide out cabinet for under the nav table (see photo).

Also suggested is the behind the stairs alternative. Jon Vez (Solstice #582 ) found that a larger Rubbermaid trash can that fits the 'large size' trash bags fits perfectly between the forward engine cowling and the companionway steps. It is just snug enough to keep it in place while heeled and exposed enough to toss things in from the cockpit. Adam Weiner (Kele #218) has a variation on this approach and has a can on top of the stored hatch boards. To hold the can in place he cut and sanded a piece of teak into a nice shape, screwed the teak piece into the teak bar above the ladder and pivots this piece over the lip of the trash can. The big advantage of this set up is that it is accessible to the cockpit AND the galley.

Lastly, Bruce Stanley (and others) have attached a small trash bin to the inside of the galley, undersink, door (very handy for scraping plates) and then they move the trash into a larger bin located in the port lazarette (at the stern) where they also separate out and store recyclables.