Upgrade to a Larger Holding Tank
Tag: head upgrades
This spring, we replaced our factory 12 gal.tank with a 22 gal. Ronco B348 tank, the same model now used by the factory on newer C320’s. Why do this? We are cruisers. We like to anchor or moor rather than take a slip. We hate having to pump-out every three days. I use the rule of thumb of 3-4 gal. per day for the two of us. With the new tank, I figure we’ll get at least 6 days between pump-outs.
The original tank was shorter but wider and not nearly as long. It sat on a wood shelf the legs of which were glassed to the hull. The new tank is much longer, taller, but narrower, and needs to sit on the hull so the shelf had to come out. Removing that shelf was the worst part of the job.
The advice received from the C320IA discussion list, including pictures from two owners, was invaluable in giving me the confidence to proceed with the project. Just knowing the job is doable makes it easier to undertake. Having the practical advice makes it worthwhile.
I bought the tank, hose, and fittings from Catalina in Florida. Ellie Quinn in Parts was a big help. She knows her stuff and got the parts to me quickly. By the way, the prices were as good or better as I could find elsewhere. You can pay $8-$10 a foot for better hose; but, I didn’t bother. The production stuff is good enough for my needs.
I ordered 14 feet of 1-1/2 inch hose. On the older boats, the head hose runs between the hull and head liner and needs some extra length. The newer models, I’m told the hose enters the liner directly and passes behind the head to the pump. The 14 ft.of hose was just enough for all three runs with plenty to make the wide turns you’ll need, to make inserting and removing the tank easier.

Other parts are:
¾” vent hose (Catalina sent more than enough)
Tank with new elbow fittings, vent fitting
New SS hose clamps (allow for double clamping)
New hose from macerator pump to thru-hull
New tank hull vent (do it now, you won’t do it later)
Save the elbows and “T” fitting from old tank for use on macerator pump. The “T” fitting moves from the old tank to the macerator pump.
As for tools, the biggest help was from an auto tail pipe expander for getting the new hose on the fittings. You can get these from an auto store or Harbor Freight. The next biggest help came from a heat gun that softened the hose even more.
Here are the other tools and supplies:
hacksaw blade in small holder for cutting through hose
paper towel
plastic bags
duct tape
dish detergent
Teflon tape, the heavy duty if available.
wire cutter or Dremel tool (for wires in hoses)
misc. pliers, screwdriver, etc.
pipe wrench for tightening fittings on tank and macerator pump
An electric screwdriver with a 5/16 in. socket makes tightening the clamps a snap.

The technique for attaching a 1-1/2 in. hose to a fitting is to insert the tail pipe expander in the end of the hose and rotate the shaft with a wrench to expand the hose while heating with a heat gun or hair dryer. When the hose is expanded larger than the fitting, remove the expander and install the hose on the fitting pushing as far onto the fitting as possible. Be sure when measuring hoses that you allow for the length of the fitting.
The biggest help of all was from my spouse and mate. Pattie was with me every step of the way lending moral and physical support. This is definitely not a one-person job. While most of the work can be done by one, some cannot. A second pair of hands and a second brain is a great help.
Demolition – Before you begin the demolition, I suggest you flush out the hoses and tank well with warm water and a mixture of detergent and water softener. Let the mixture sit for 2-3 hours or overnight then pump-out flushing multiple times with fresh water. This will make the job of removing the old hoses much less unpleasant.
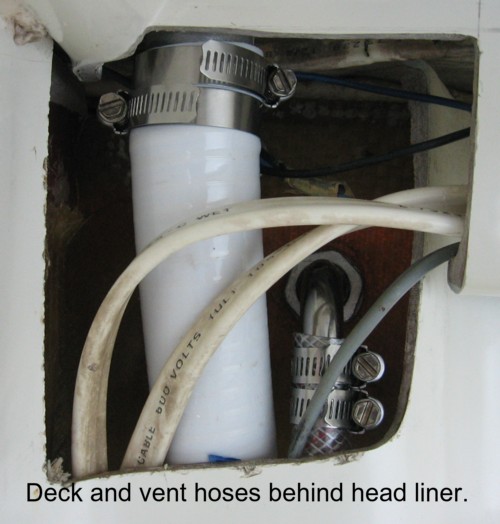
The hardest part of the demolition was removing the panel in the head above the cabinet. It is fitted tightly and there is no way to get a hand-hold to exert any force, and force it takes to pull it out. I removed the 120V outlet, and used a blade to break any silicone bond left from the original sealing of the head liner to the cabin liner. I found it necessary to remove also, the cabinet, fluorescent fixture, and fillets. Once I could make enough room to get my hand around an edge of the panel, I was able to pull it out. It went back in much easier as you might imagine. From here, I could access both the hose to the deck fitting and the vent hose and vent, and the hose to the head.
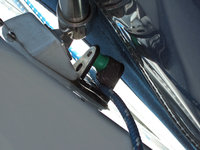
Remove the vent hose and vent. You’ll need the room this provides. Remove the clamps entirely from deck hose, and remove the screws from the deck fitting. You’ll have to break the bedding seal of the deck fitting by working it from below and above. Protect the fitting and the deck if you pry it up as the aluminum is soft and you’ll easily damage the edge. Once you have the deck fitting loose, push the fitting with hose attached up through the deck and cut through the hose separating it from the fitting.
I found the best approach is to cut the old hoses off rather than attempting to pull them off the tank fittings. Be warned, though, some of the plastic fittings may extend well into the hose. Avoid cutting the fitting by cutting the hose no closer than 6-8 in. from the end. Once cut, plug the severed ends with a piece of plastic bag around paper towel or rag. Then tape up the ends with duct tape. Now the tank is free. The tank will have some residue remaining so remove the tank carefully. Save the old elbows and the “T” fitting.
With the tank and macerator free, remove the cut hoses from them by slitting length-wise with a utility knife or use a rotary tool. If cutting with a knife, you’ll need to stop periodically to snip any wires in the old hoses. Newer sanitation hose may be all plastic without any wires.
To remove the head hose, I found it easiest to remove the joker valve fitting on the head. It was then easy to remove the fitting from the hose without having to cut the hose avoiding a difficult cut. Seal and pull out that hose.
It was necessary to relocate the macerator pump forward as the new tank did not allow sufficient room to leave it where it was. I made a new mounting board for the new location and left the old one in-place.

Installation – Now the fun begins. Using Teflon pipe tape, apply many wraps of tape on the threads of the new elbow fittings for the tank. 5-7 wraps won’t be too much, use lots. You want the fittings to be tight. Do not use pipe cement as you need to be able to adjust and remove the fittings. With pipe wrench, screw elbow fittings to tank and point in outboard direction.
I found it necessary to install and remove the new tank multiple times in the process of measuring and dry fitting hoses. It is done easily by standing the tank vertically with large end down, tip small end fwd to allow fittings to enter space, move back to vertical, rotate small end to starboard and the tank will slide in.
Before installing the tank, note the location of any wires and hoses in the space. On #62, the hot and cold water hoses to the head emerge into the space aft and run along the aft wall of the liner. I had to make special efforts to prevent the tank from compressing these hoses. I finally made a “stand-off” to be sure the tank would not press on these hoses. You could attach the stand-off to the tank or to the wall of the space over where the hoses emerge. The tank when full may have slight movement so be sure it won’t hurt anything. You surely don’t want to have to pull it once the project is done.
Before marking the position of the tank on the hull, put the macerator pump in-place to make sure it will clear the tank, the thru-hull, and etc. Note in the picture how the outboard end of the tank angles aft and the inboard end is forward. This is how the factory does it, and is further protection for the water hoses. I even used an “L” shaped shim at the lower edge of the tank to further insure it stays where I want it. When you are sure the tank is positioned properly, make some marks on the hull for future reference.
With the tank in-place, pull a hose from tank space to the head and attach the hose to the toilet fitting. Allowing the hose to make a wide turn around the outboard end of the tank (see picture,) mark the hose for the top fitting on the tank and cut with the hack saw.
Dry-fit the “T” fitting with two (old) elbows onto the macerator pump. Place pump in position allowing room to operate thru-hull valve. Make rough measurement of hose length from output fitting on tank (lower one,) to the input fitting on macerator pump. Mark location of macerator pump on hull. If you are moving macerator pump as did I, make a 5”x6”x1/2” mounting board. Mount the board to hull with 3M 5200 adhesive and run a bead around the board to make fillet with the hull. Tape in-place with duct tape and allow to cure. (Use 3M fast-cure, or allow 3-5 days to be cured and workable.) The exact position of the pump on the mounting board will come later.
Run remaining section of hose around back of tank and up through the hole for the deck fitting. Use the expander and heat gun to attach the hose to the deck fitting. Dry fit the deck fitting in-place. Hold macerator pump in-place on the mounting board and pull the deck hose to the fitting on the pump; mark and cut the hose. The remaining hose should be sufficient to join lower output fitting on the tank to the macerator pump input which is the lower end of the “T” fitting. Cut the hose to the measured length.
Using Teflon tape, affix the fittings to the macerator pump, and tighten with a wrench.
With the tank once again removed, attach the short piece of hose to the lower fitting on the tank. Double clamp the connection as you won’t be able to do this in-place. This time, insert the tank in the space so that lower fitting is below the edge of the entrance and rotate the tank partly to starboard with upper fitting above edge of entrance. Now, affix the hose from lower fitting on tank to the macerator pump with double clamps. You may leave the clamps loose for now. Affix the head hose to upper the upper fitting on tank with two clamps. Rotate the tank up to vertical, lower tank into space as before and rotate to starboard as the tank slides into place. Position the tank to marks on the hull made earlier. Now, the tank is in-place with all but the deck hose attached.
Push the deck hose and fitting back up through the deck. Lay some masking tape on the deck around the opening for the deck fitting. Push the deck fitting down to the deck and with a utility knife, draw the knife around the edge of the deck fitting cutting through the tape. Pull the deck fitting back up and remove the tape from under the fitting. This leaves a taped surface that will make for a neat bedding and easy removal of excess sealant. Apply 3M-4200 or suitable sealant (not 5200!) to the deck inside of the taped circle. Now for the trick: On our boat, because of the cant of the deck, the hose has to make a slight bend between the hull and the head liner. This was difficult to do on a cold day and required one person to force the hose to bend so the deck fitting would sit flush on deck while another tightened the screws.
Now, the deck hose can be attached to the “T” fitting on the macerator pump with double clamps, of course. Place the macerator pump on the mounting board positioning so that the thru-hull will operate easily and screw it down to the mounting board.
The last hose is the vent. Install the new vent in the hull and attach the vent hose to it. Attach the other end of the vent hose to the vent fitting on the tank. All hoses and fittings are now installed. Go over each clamp and make sure it is tight on the hose. Hopefully, you positioned each clamp so you can check and tighten it in the future, if necessary.
Make the tank hold-downs as shown in the picture. I used 2x3 boards painted. Each board has a cut or extension at the edge of the tank to prevent it from moving.

Fill the tank and let it stand while checking for any leaks. Test the macerator pump and do a pump-out though the deck fitting to make sure everything works.
Don’t be surprised if your next project is to install a holding tank monitor. With a 22 gal. tank, I find that it’s much harder to estimate when approaching full.
Please feel free to contact me on any of the details as you plan and execute your own holding tank project. And, oh yes, be sure to re-assemble the head cabinets before your next outing.
Warren Updike, Warr De Mar, #62

What's Related